Building a Camera Slider Part 2
· 226 words · 2 minutes read
In the previous post I outlined my design as well as linking to some of the inspiration for my design. In this post I’m going to show off the design fail that I noticed after I printed my first part:
Ⓒ 2018 Sean Smith
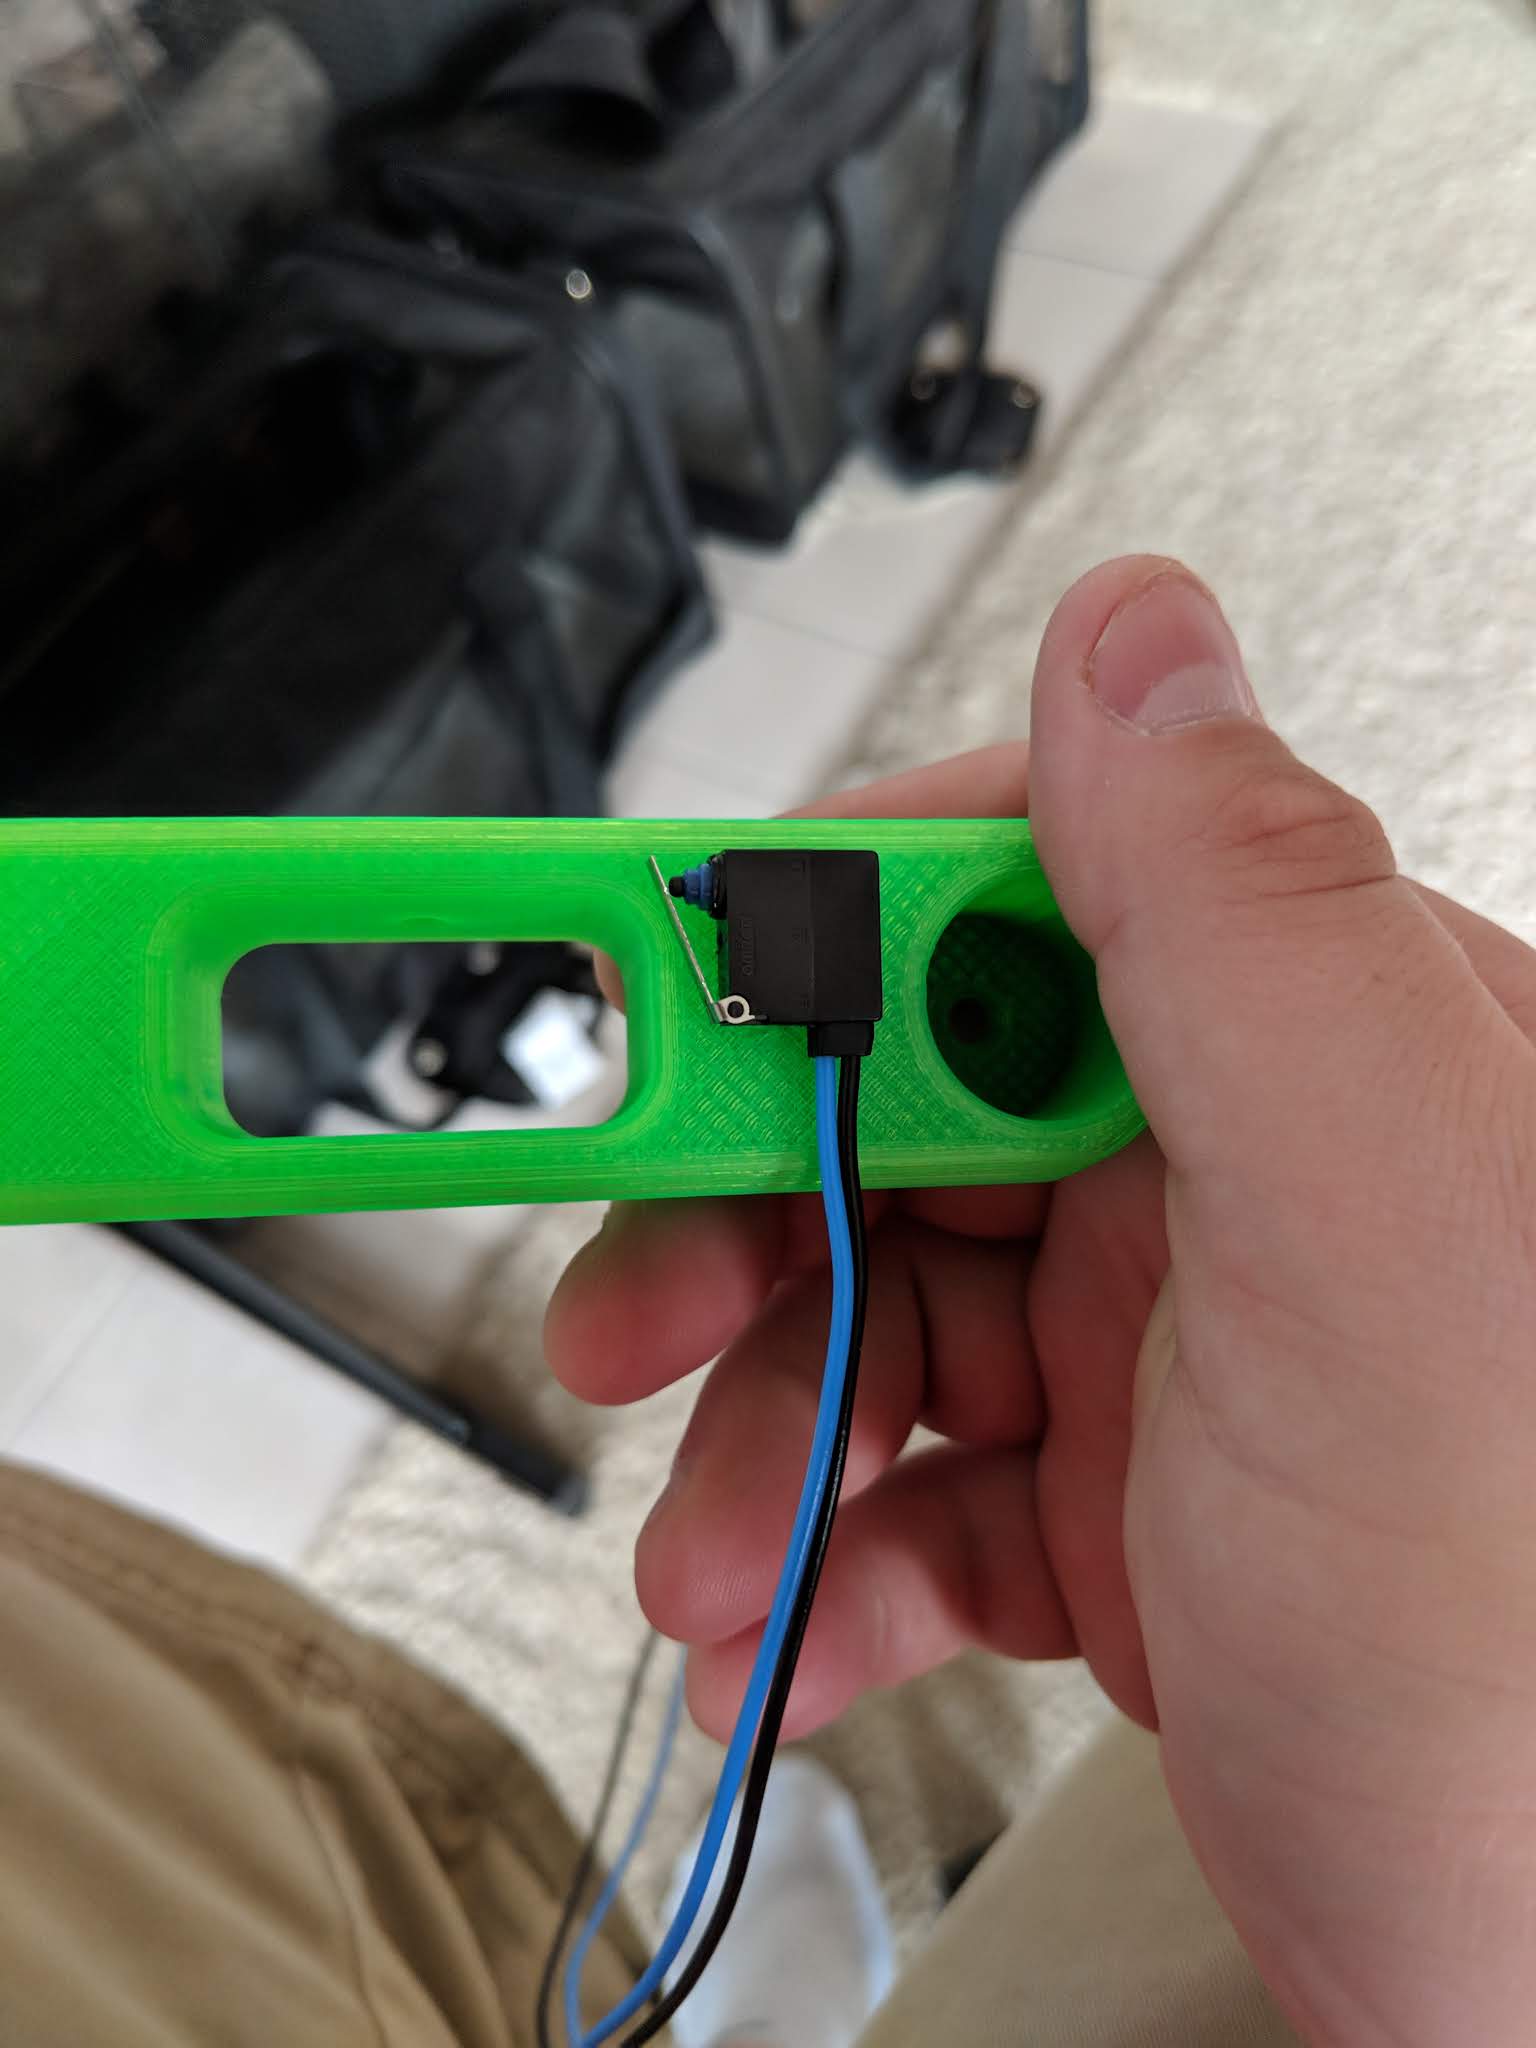
Looking at the part the limit switch fits perfectly, the holes line up and are the right size for the poles that stick out on the limit switch for mounting. However on second inspection (or maybe the first if you’re less oblivious than me), you’ll probably notice that the limit switch isn’t going to do much based on the design from the last post. In case you haven’t figured it out yet, the camera is going to be sliding towards the large holes, but the limit switch is 90 degrees off, pointing at the wholes instead of lining up with them. I have updated the design and on the next one I print will have the limit switch within the central rectangular hole and will extend the switch out to stop the motor before damaging it.
My next post will hopefully be all the parts put together as well as some step by step images of how it was made and put together without the electronics. I am not sure when that will be but hopefully within the next couple of weeks.